Control Arm Bushing Up-Grade-...

pokeyl

Enthusiast
Joined
Dec 11, 2016
Posts
57
Reaction score
22
This may have been covered before. I am using the Energy Suspensions Gen 2 bushing kit on my 2004, $200 for both front and rear.

You must be registered for see images attach


I also used a bushing press kit from Amazon. Works perfect!
You must be registered for see images attach


I have not started the rear yet!
 

Attachments

  • 20240922_095505.jpg
    20240922_095505.jpg
    138 KB · Views: 17
  • 20240922_095528.jpg
    20240922_095528.jpg
    115.2 KB · Views: 17
  • 20240922_095540.jpg
    20240922_095540.jpg
    151.5 KB · Views: 17
OP
OP
pokeyl

pokeyl

Enthusiast
Joined
Dec 11, 2016
Posts
57
Reaction score
22
Just do one part at a time. Top, then reinstall, follow with the bottom. About one hour per side after the jacking and wheel off.
You must be registered for see images attach


You must be registered for see images attach


You must be registered for see images attach
 

Old School

Enthusiast
Joined
May 14, 2023
Posts
128
Reaction score
63
Location
North Alabama
Just do one part at a time. Top, then reinstall, follow with the bottom. About one hour per side after the jacking and wheel off.
You must be registered for see images attach


You must be registered for see images attach


You must be registered for see images attach
The rears can be done the same way, with the axle and place, just a little more challenging.

Also, a good time to replace the lower shock bushings, mine were metal on metal.
 

MambaK100

Enthusiast
Joined
Apr 5, 2024
Posts
2
Reaction score
0
Location
Oregonistan
I need to do the same to my 2004 Viper. Thank you for the writeup and photos.
May I ask, where did you buy the bushing kit? I cannot seem to find it for the Gen3 Vipers.
 

GTS Dean

Enthusiast
Joined
Jul 22, 2000
Posts
3,881
Reaction score
274
Location
New Braunfels, Texas
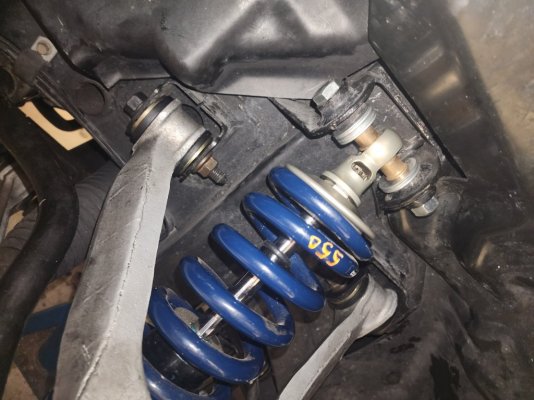
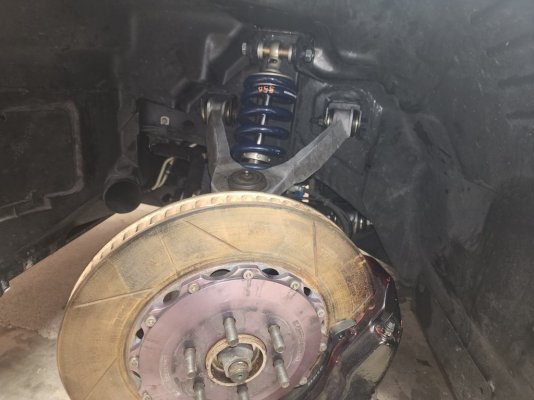
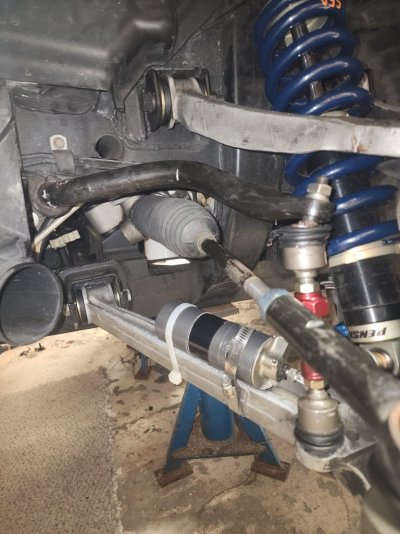
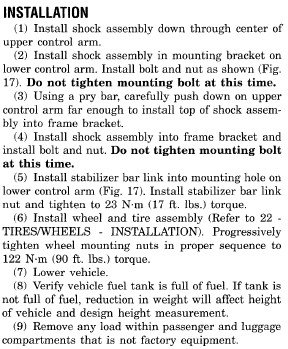
For anyone NOT using urethane bushings, or monoball bearings in your suspension the following excerpts from the Service Manual are important. Some warnings about not fully tightening bushings in shock eyes, wishbone pivots, swaybar end links are repeated CONSTANTLY throughout. And here are the warnings:

You must be registered for see images attach


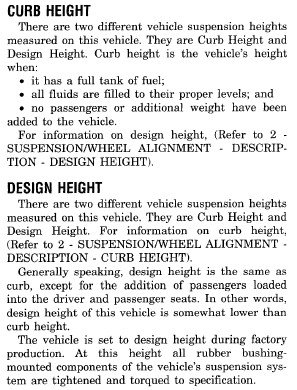
Remember this: depending on Gen, the cars are ballasted with at least 150-165# in each seat to adjust the frame heights relative to the lower, inner wheel lips. Once that is in-spec, ALL the other bushings are tightened from a basic assembly torque of 30-40 lb-ft up to their final spec. You can't get at all the bolts with the tires installed, but the lower wishbones have to be supported at that height. If you loosen any bolts other than the lower cam adjusters, the process should be done at any corner or end of the car you worked on. In addition to the shocks, the bushings help control compression and rebound dynamics of the chassis.

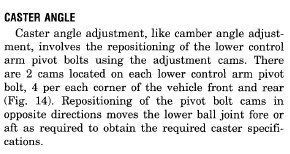
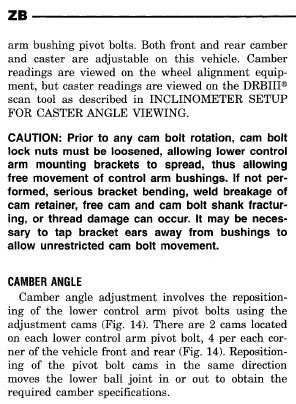
And with respect to the alignment cams, if they are pulled during disassembly, you need to start with them centered in the mounting ears with the index holes pointing up and 12 o'clock. If your frame and bushings are in good shape, your basic alignment should be pretty close right there.

FYI - all these excerpts are from the 2006 Gen 3 manual. There is a lot of similarity between Gen 1, 2 and 3 language. I suspect Gen 4 and 5 are pretty similar too.
 

Attachments

  • Curb-Design Ht_Bushing torque.jpg
    Curb-Design Ht_Bushing torque.jpg
    58.4 KB · Views: 14
  • Shock install.jpg
    Shock install.jpg
    55.9 KB · Views: 14
  • Caster angle adj..jpg
    Caster angle adj..jpg
    22.9 KB · Views: 12
  • Caster-Camber adj _Viper.jpg
    Caster-Camber adj _Viper.jpg
    62.6 KB · Views: 10
Last edited:
OP
OP
pokeyl

pokeyl

Enthusiast
Joined
Dec 11, 2016
Posts
57
Reaction score
22
Make sure you buy 2 rear kits! Gen 3-4-5 all take the same bushings front and rear.
 
Top