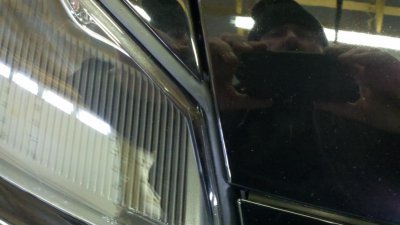
Headlight/body alignment

Mopar488

Enthusiast
Joined
Nov 26, 2002
Posts
807
Reaction score
0
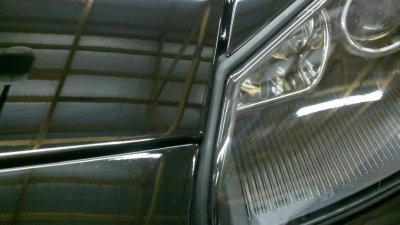
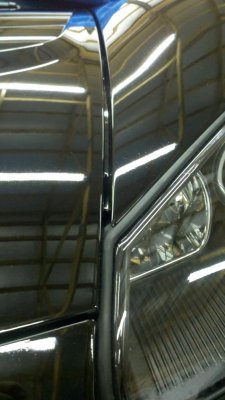
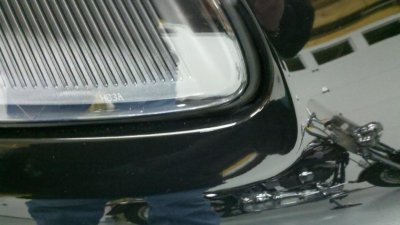
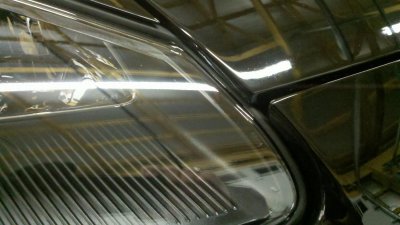
I recently had both headlights replaced due to fogging up. This is the end result.
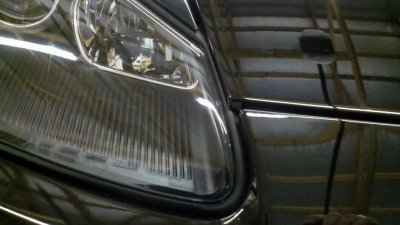
Take a look at the right headlight picture. The right end edge of the hood is real close to the headlight glass. I am a little worried that the hood will hit the headlight and crack the hood. There is also a gap between the right headlight seal and the facia.
The left headlight is fogging up, but I am not worried about that, but there is a pretty good sized gap between the left fender and the hood. I have sent these pictures to the dealer/mechanic and he said his service manager is not wanting to fool with it anymore. The mechanic said there was shims on the right headlight and he left them there per service manual. The left headlight did not have any shims. The mechanic is willing to work on them again. Prior to me having a conversation with the service manager, does anyone have any idea what needs to be done to get my gaps fixed?
 

Attachments

  • 2011-01-03_21-18-06_739.jpg
    2011-01-03_21-18-06_739.jpg
    95.6 KB · Views: 108
  • 2011-01-03_21-18-45_351.jpg
    2011-01-03_21-18-45_351.jpg
    94.9 KB · Views: 89
  • 2011-01-03_21-19-02_50.jpg
    2011-01-03_21-19-02_50.jpg
    93.4 KB · Views: 85
  • 2011-01-03_21-22-13_643.jpg
    2011-01-03_21-22-13_643.jpg
    95.5 KB · Views: 69
  • 2011-01-03_21-18-23_113.jpg
    2011-01-03_21-18-23_113.jpg
    95.4 KB · Views: 76

Garron

Enthusiast
Joined
May 16, 2008
Posts
539
Reaction score
0
Both headlamps should have two shims on the outer stud closest to the side of the car. One should be white and one should be black. Below is a bulletin from Chrysler for viper headlamps.

Garrett

DISCUSSION:
Some customers may report that on occasion, vehicle exterior lamp assemblies are fogged with a light layer of condensation on the inside of the lenses. This may be reported after
the lamps have been turned on and brought up to operating temperature, turned off, and then rapidly cooled by cold water (such as rain, or the water from a car wash). Lens
fogging can also occur under certain atmospheric conditions after a vehicle has been parked outside overnight (i.e., a warm humid day followed by clear cool night). This will
usually clear as atmospheric conditions change to allow the condensation to change back into a vapor. Turning the lamps on will usually accelerate this process. A lamp that has large amounts of water droplets visible on most internal surfaces indicates a problem with the lamp sealing that has allowed water to enter the lamp. In this instance, the customer is likely to report that moisture in the lamp is always present and never
disappears. A lamp that exhibits internal moisture permanently should be replaced.
POLICY:
Information Only
 

kennyhemi

Enthusiast
Joined
Jan 20, 2008
Posts
458
Reaction score
0
Location
Miami Fl
Mopar488
I had mine replaced a couple of years ago on my 06 for the same reason. After the dealer got done with them I needed to loosen the right lens/HID assy which is all one unit! There is about 1/8 play in the assy. But in your picture it also looks like the tech loosend right side of your front bumper cover, Then when he tighten it up didn't line up the edge with the hood. When replacing the lens/HID assy you need to loosen the fender and remove the wheel cover (wheel too)to gain access to the screws holding the lens/HID assy, If not! then he loosen the front cover and removed them out the front. Easier this way but then you have the issue your having when they don't line up, and have no way of moving the lens/HID assy. btw your lens assy will crack way before your hood will. That said the lens/HID assy is msrp over 2K ea. (more than the hood) Sorry to say but it looks like a rookie doing the work here, Like in my situation!
 
OP
OP
M

Mopar488

Enthusiast
Joined
Nov 26, 2002
Posts
807
Reaction score
0
Mopar488
I had mine replaced a couple of years ago on my 06 for the same reason. After the dealer got done with them I needed to loosen the right lens/HID assy which is all one unit! There is about 1/8 play in the assy. But in your picture it also looks like the tech loosend right side of your front bumper cover, Then when he tighten it up didn't line up the edge with the hood. When replacing the lens/HID assy you need to loosen the fender and remove the wheel cover (wheel too)to gain access to the screws holding the lens/HID assy, If not! then he loosen the front cover and removed them out the front. Easier this way but then you have the issue your having when they don't line up, and have no way of moving the lens/HID assy. btw your lens assy will crack way before your hood will. That said the lens/HID assy is msrp over 2K ea. (more than the hood) Sorry to say but it looks like a rookie doing the work here, Like in my situation!

Thanks for your response. I went to talk to the mechanic after I read the procedure from the factory manual. He claimed he removed both wheels and inner fender openings and loosened 4 bolts on each fender and 3 nuts on the headlights and then the headlights came out through the opening in the inner fenders. He said it was a PITA. Since they are balking about fixing it, I may try it myself. It sounds like I might need to get some shims for the left headlight since the mechanic said there was not any there.
 

kennyhemi

Enthusiast
Joined
Jan 20, 2008
Posts
458
Reaction score
0
Location
Miami Fl
Thanks for your response. I went to talk to the mechanic after I read the procedure from the factory manual. He claimed he removed both wheels and inner fender openings and loosened 4 bolts on each fender and 3 nuts on the headlights and then the headlights came out through the opening in the inner fenders. He said it was a PITA. Since they are balking about fixing it, I may try it myself. It sounds like I might need to get some shims for the left headlight since the mechanic said there was not any there.

Well! it looks like he did it the correct way. Maybe you just got unlucky and received a out of spec right lens/HID assy that will need some shims. I wonder if he still has the original assy(fat chance) set it in and see if it would line right up again? In that case I would try to get them to order a new one (fat chance huh?)good luck!!
 
OP
OP
M

Mopar488

Enthusiast
Joined
Nov 26, 2002
Posts
807
Reaction score
0
Well! it looks like he did it the correct way. Maybe you just got unlucky and received a out of spec right lens/HID assy that will need some shims. I wonder if he still has the original assy(fat chance) set it in and see if it would line right up again? In that case I would try to get them to order a new one (fat chance huh?)good luck!!

The mechanic and I discussed ordering a new headlight, but the service mgr is balking. Visually the new light rubber seal looks entirely different from the stock headlights. We also thought the mounting holes could be off. Maybe they switched suppliers since them. The original seals were tighter and firmer looking. I have sent a nice email to the service mgr to let him know I will be calling to discuss. I always try the nice approach first...
 

Black Moon

Enthusiast
Joined
Dec 28, 2007
Posts
1,730
Reaction score
0
Location
Knoxville, TN
I recently had both headlights replaced due to fogging up. This is the end result.
Take a look at the right headlight picture. The right end edge of the hood is real close to the headlight glass. I am a little worried that the hood will hit the headlight and crack the hood. There is also a gap between the right headlight seal and the facia.
The left headlight is fogging up, but I am not worried about that, but there is a pretty good sized gap between the left fender and the hood. I have sent these pictures to the dealer/mechanic and he said his service manager is not wanting to fool with it anymore. The mechanic said there was shims on the right headlight and he left them there per service manual. The left headlight did not have any shims. The mechanic is willing to work on them again. Prior to me having a conversation with the service manager, does anyone have any idea what needs to be done to get my gaps fixed?

Is the hood gap off all the way to the back or just at the bumper? If it's just at the bumper you can easily adjust the hood latch behind the bumper to move the hood side to side. I think they are 10mm or 12 mm nuts. Look and see if there are indentions where it might have been originally. Also check to see that the hood alignment bumpers are still in place. There are two on each fender, one at the front and one at the back. Something obviously has changed if it was equal before the work. The headlights are pretty easy to adjust in and out but not side to side. The holes they are mounted to are slotted front to back so loosen the three nuts and slide it where you want it. My car only had shims on one side so I think it varies with each car to get a perfect fit. I just took mine out to tint them and it's not that bad a job. Just remove the front section of the inner fender if you want to push the light but you only need to remove the access panel below it to access the three plastic acorn nuts. I hope you have small hands. I took the easy way out and just removed the front bumper (about 30 screws and disconnect the fogs). I took mine off to polish it and spray clear chip guard on the bottom. I had hundreds of scratches. Most of them buffed out and the chip guard should protect the bumper in the future. I also pulled my rockers to insulate the mufflers and polished and sprayed chip guard on them as well.

To me if you have some basic tools these cars are easy to work on. Go for it. You can do it yourself, avoid the dealer doing more damage and have the satisfaction that you did it yourself.

Keep us posted.
Sal
 

Black Moon

Enthusiast
Joined
Dec 28, 2007
Posts
1,730
Reaction score
0
Location
Knoxville, TN
I'm not sure what the issue is with the lights except the drivers side looks like it is further out than the right one. Is there some other issue I should be looking for in the photos?

If and when you pull the lights there are little plastic tabs on the light housing that the seal needs to slide under. Check the seal before reinstalling.
 
OP
OP
M

Mopar488

Enthusiast
Joined
Nov 26, 2002
Posts
807
Reaction score
0
I'm not sure what the issue is with the lights except the drivers side looks like it is further out than the right one. Is there some other issue I should be looking for in the photos?

If and when you pull the lights there are little plastic tabs on the light housing that the seal needs to slide under. Check the seal before reinstalling.

I put the left light photo in to show the wide gap between the left fender and hood that was not there before. I loosened the 4 bolts from the end and tried to slide the fender over toward the hood, but it would not budge. The right light has a gap between the front of the seal at the inside corner and the right front corner of the hood is real close to the lens.
 

Black Moon

Enthusiast
Joined
Dec 28, 2007
Posts
1,730
Reaction score
0
Location
Knoxville, TN
I put the left light photo in to show the wide gap between the left fender and hood that was not there before. I loosened the 4 bolts from the end and tried to slide the fender over toward the hood, but it would not budge. The right light has a gap between the front of the seal at the inside corner and the right front corner of the hood is real close to the lens.


Try adjusting the hood latch first.
 
OP
OP
M

Mopar488

Enthusiast
Joined
Nov 26, 2002
Posts
807
Reaction score
0
Try adjusting the hood latch first.

My concern with that is the stripes are perfect now and the mechanic claims he did not move the hood or the facia, so I don't want to mess up my stripes. I will try to tackle the right light first. I used to jack up my old Vipers and put jack stands under the frame, but this one has a body panel underneath and you can't put a jack stand anywhere without removing the body panel . How did you jack it and then support it to get the wheel off?

Never mind about the jacking, I saw your garage and lift. I have my garage built, next will be the lift. By the way, nice ***** pics.
 
Last edited:

kennyhemi

Enthusiast
Joined
Jan 20, 2008
Posts
458
Reaction score
0
Location
Miami Fl
My concern with that is the stripes are perfect now and the mechanic claims he did not move the hood or the facia, so I don't want to mess up my stripes. I will try to tackle the right light first. I used to jack up my old Vipers and put jack stands under the frame, but this one has a body panel underneath and you can't put a jack stand anywhere without removing the body panel . How did you jack it and then support it to get the wheel off?

Never mind about the jacking, I saw your garage and lift. I have my garage built, next will be the lift. By the way, nice ***** pics.

I agree with you Mopar488 DO NOT move anything else! It was right to begin with and you could open a can of worms if you start ajusting other stuff to make up for it. (Been down that road before) Wait until you exhaust all of your dealer request options before you take it upon your self to fix it. Also a wise word! Dont suggest what they should do, They are the experts! Write everything down they told you from the begining they tried, This should help you if you need to take it to another dealer of try to fix it yourself like I did because I realized I was on my own on getting it right.
 

Black Moon

Enthusiast
Joined
Dec 28, 2007
Posts
1,730
Reaction score
0
Location
Knoxville, TN
My concern with that is the stripes are perfect now and the mechanic claims he did not move the hood or the fascia, so I don't want to mess up my stripes. I will try to tackle the right light first. I used to jack up my old Vipers and put jack stands under the frame, but this one has a body panel underneath and you can't put a jack stand anywhere without removing the body panel . How did you jack it and then support it to get the wheel off?

Never mind about the jacking, I saw your garage and lift. I have my garage built, next will be the lift. By the way, nice ***** pics.

I didn't realize you had stripes which means that the hood and front bumper were never in alignment from the factory. If you can't move the fender and don't want to move the hood because of the stripes I'm not sure you can do anything except adjust the lights. Kenny's right, I'd let the dealer have another shot at it before doing it myself. Take a ton of before photos especially under the car. Too many horror stories about dealers not to take precautions. Inspect the car with the service manager before handing him the keys. Good luck
 

VJR3

Viper Owner
Joined
Aug 5, 2010
Posts
267
Reaction score
0
Location
"In Freedom"
The problem is your have a mechanic work on it :lmao:
You need to have a bodyman/collision repair technician take a look at it. Thats all they do all day, I know I am one, we live by body gaps :)
 
OP
OP
M

Mopar488

Enthusiast
Joined
Nov 26, 2002
Posts
807
Reaction score
0
UPDATE:

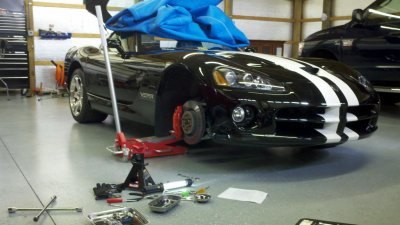
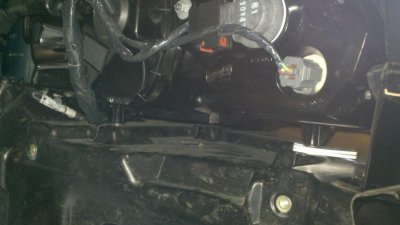
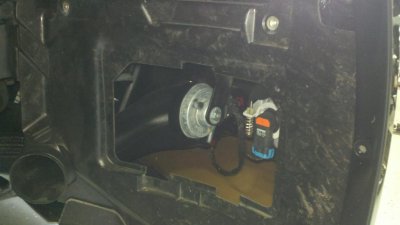
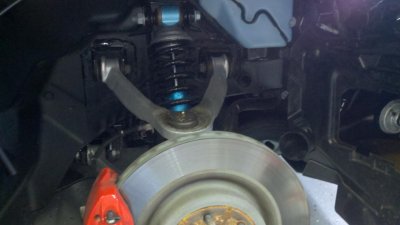
After trying to reach the service manager 3X since last Wednesday, I took it upon myself to fix my headlight. I took it all apart and what a PITA. The problem was the light was not pushed forward enough. I loosened the nut on the two studs on the front and back of the left side of the right headlight and slide it forward and tightened it. I checked the nut on the stud where the shims are and tightened it. Once I was putting everything back together, I noticed that the two holes on the facia had been broken either on purpose where the facia and the fender come together in front of the wheel at the factory or when the mechanic did the job, the small screw was missing that went under the clamp once it was removed. The mechanic probably left it out. I then turned my attention to the gap on the left side where the fender meets the hood. Once I removed the fender screws, I realized there were no rubber spacers between the fender and the base where the screws go. The right side had all of them except at the end. I called the mechanic and told him what I found and he is going to get some spacers for me. About an hour the service manager emailed me and let me know the mechanic would be in touch tomorrow. What a mess. I am just glad I am getting it back looking normal. My biggest concern is whether or not the holes in the facia mount should have the openings in them on the inside toward the engine.
 

Attachments

  • 2011-01-25_12-36-18_665.jpg
    2011-01-25_12-36-18_665.jpg
    95.9 KB · Views: 21
  • 2011-01-25_12-36-49_969.jpg
    2011-01-25_12-36-49_969.jpg
    94.3 KB · Views: 25
  • 2011-01-25_12-37-01_843.jpg
    2011-01-25_12-37-01_843.jpg
    93.5 KB · Views: 20
  • 2011-01-25_12-37-12_700.jpg
    2011-01-25_12-37-12_700.jpg
    95.7 KB · Views: 20
  • 2011-01-25_12-38-05_375.jpg
    2011-01-25_12-38-05_375.jpg
    93.3 KB · Views: 22
Last edited:
Top